Now that you have been collecting outbound connection logs from sysmon or your firewalls, the next step is to ask ourselves, how do we enhance that data? Geo-tagging IP addresses, and adding threat intelligence can allow us to get a better idea of where our endpoints are connecting to, and if they are connecting to any known malicious IPs. Let’s get started
Adding Threat Intel
Logstash is my favorite log parser due to the fact that it’s very flexible. One the plugins that I’ve been using is the Translate plugin which allows you to use a “Dictionary” file (which can be a YAML,JSON, or CSV file) and compare it to any incoming values being sent to Logstash. For this use case, we will be using a destination IP field value in which we will compare any generated logs against a list of known BAD ip addresses in our .YAML which we will create next.
Here’s the steps we will take to accomplish this:
- Create a Python file to create our “BAD IPs” YAML file
- Install the translate Plugin for Logstash
- Configure Logstash to use the Translate plugin.
Note: I’m running Centos 7, and Logstash 5.x, and Python 2.7.5
1. Creating our “BAD IP” .YAML file
Navigate to your /opt/logstash
cd /opt/logstash/
nano
(paste the following)
()#!/usr/bin/env python

import urllib2, re

def writeYAML():
        yamlFile = open('/opt/logstash/AlienVaultIP.yaml','w')
        url='https://reputation.alienvault.com/reputation.generic'
        html = urllib2.urlopen(url)
        for line in html.readlines():
                line = re.sub('\\r|\\n','',line)
                newLine=line.split(' ', 1)[0]
                yamlFile.write("\"" + newLine + "\": \"YES\"" + "\n")
        yamlFile.close()

if __name__=="__main__":
        writeYAML()
and save (CTRL + O)
Script credit MyBroElk
Next, run the file by running the following:
python AlienVaultIPReputation.py
You should now have a file called AlienVaultIP.yaml
You can open the file to view it
nano AlienVaultIP.yaml
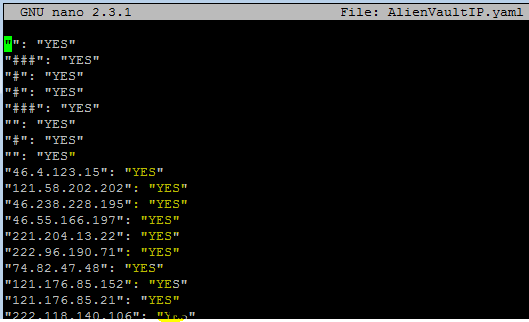
What did we do? We downloaded a list of IP addresses from https://reputation.alienvault.com/reputation.generic and added a “YES” column to our YAML file which we will use to match our Destination IP field values in logstash.
2. Installing the Translate Plugin in Logstash
Navigate to /usr/share/logstash and run the translate plugin install
cd /usr/share/logstash/
bin/logstash-plugin install logstash-filter-translate
you should see a “Installation successful” message if it was downloaded successfully.
3. Configure Logstash to use the Translate plugin
Navigate to your logstash configuration which should be in located /etc/logstash/conf.d and edit your current configuration (My logstash configuration is called winlogbeat.conf ). For this use-case I am using my sysmon network outbound connections; however, you can always use your ASAs, or other firewall logs.
nano /etc/logstash/conf.d/winlogbeat.conf
Paste the following:
########################### AlienVault IPs ######################
filter {
  if "winlogbeat" in [tags] and [log_name] == "Microsoft-Windows-Sysmon/Operational" and [task] == "Network connection detected (rule: NetworkConnect)"  {
translate {
     field => "[event_data][DestinationIp]"
      destination => "maliciousIP"
      dictionary_path => '/opt/logstash/AlienVaultIP.yaml'
}
}
}
Save your configuration changes (CTRL + O)
Lastly, restart Logstash:
service logstash restart
What did we do? We are using the translate plugin to compare our [event_data][DestinationIp] field against our AlienVaultIP.yaml file. If there’s a match in both the field value and the .yaml file, a new field called “MaliciousIP” will be created with a value of “Yes”.
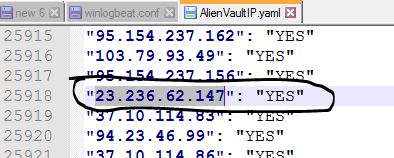
Here’s how it will look like in elasticsearch/kibana.
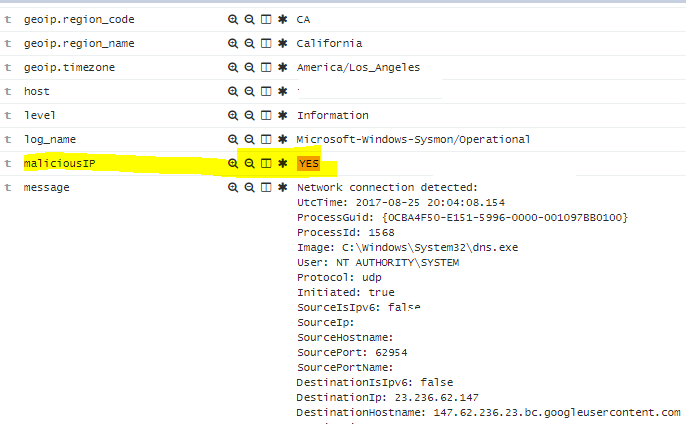
As you can see, there is in fact an IP of 23.236.62.147 in our .yaml file
Final Notes:
- You can add as many dictionary files as you’d like, or even create a massive one combining them all into a .yaml file.
- Don’t forget to refresh your field list for your elasticsearch index.
- The YAML file will be loaded in memory every 5 minutes in logstash.
- Create a Cron job to schedule the download and ensure you are getting the latest threat intel file; otherwise you will have to download it manually.
- You can also add a file hash dictionary for newly created files, I’m going to try this next (however, you can follow this virustotal tutorial for real-time file check)
I got my threat intel list from the following site: http://iplists.firehol.org/ which helped quite a bit as they compile many resources from sites such as Spamhaus.
I hope that helped out! there’s many other useful plugins that are available to install for Logstash. Send me your favorite ones or ask any questions via twitter.
Next article I will go over filtering expected Outbound connections such as Microsoft IP addresses or Private IPs
Thank you.
what would the .py code above look like if you used the firehol info instead of alienvault
It should be fairly similar although I haven’t tried it myself. Test it and out and see if you are able to figure it out.
[…] Part 2: Logstash + Threat Intelligence – This write-up demonstrates how we can add threat intel data to elasticsearch via Logstash and a simple python script. […]