The following is a step-by-step approach to setup Nexpose Data Warehouse to export to a Windows PostGres Database setup and allow Splunk to import it. The current Rapid 7 Splunk App does not function 100% and all Nexpose customers using the Splunk App are missing vulnerability data.
A Rapid 7 App for Splunk has been available which relies on various python scripts and a Nexpose Api (2.x) which triggered to pull certain data. After testing this, I realized that it does not pull all data necessary such as the “Insight Agent” vulnerability data. When comparing reports from Nexpose to those on Splunk, I realized some of the asset data was missing.
See example:

Rapid 7 Splunk App: https://splunkbase.splunk.com/app/3457/
After further reading, I realized that at some point they will decommission their current API and will focus on their newer one. Now their 3.x API is intended for automation rather than performing massive data exports. Nexpose provides a “Data Warehouse” https://blog.rapid7.com/2016/11/24/dimensional-data-warehouse-export-part-of-nexpose-646/ which allows you to export all Asset/Vulnerability data to an external PostGres Database which provides you with more functionality.
This is the direction that I decided to go to and then leverage the Splunk DB-Connect to import the data into Splunk and have a complete set of information.
Below are the Steps to setup the PostGres Database and queries used to pull data into Splunk.
Prerequisites for a Windows Environment
- Windows 2012 Server (Non-Server OS should also work).
- PostGres Database Installer
- Access to Splunk Host (Db-Connect App)
- Admin access to the Nexpose Console
- Note the IP address for Nexpose console and the Splunk Host where Db-Connect is setup
- Download and Install PostGres for Windows.
Download the latest version of PostGres for Windows.
https://www.postgresql.org/download/windows/

For this particular case we’re downloading the latest version (11).
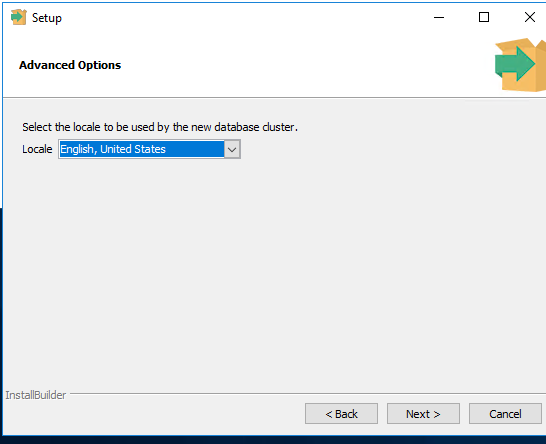
Choose the installation path. In my case I created an extra partition specifically for the DB data.
D:\PostgreSQL\11\data
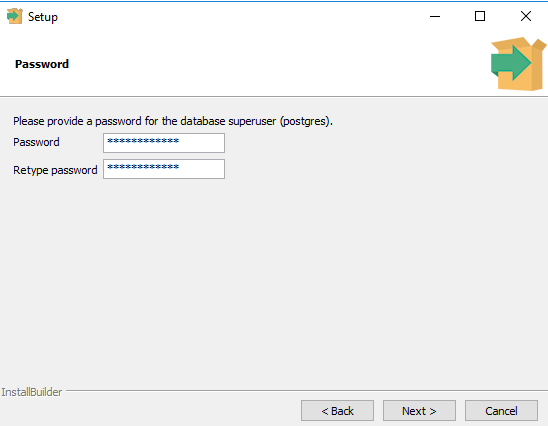
Set and record the password for the database superuser (Postgres).
You will get prompted to open “stack builder” you may click no.
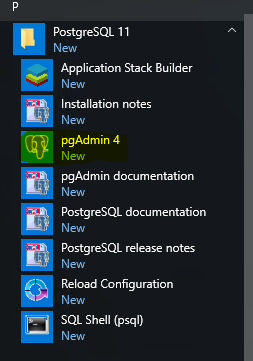
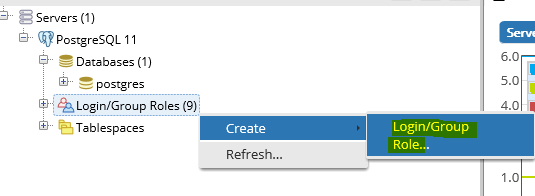
Launch PGAdmin 4
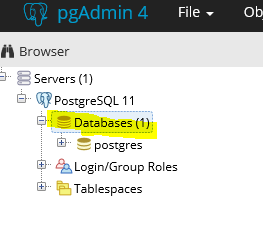
Navigate to Servers > PostgresSQL 11
You will get prompted for the password you created earlier, go ahead and enter it.
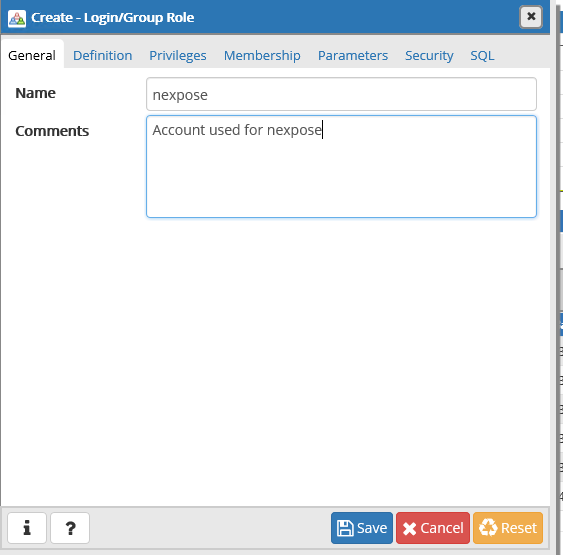
Next: Create a nexpose login
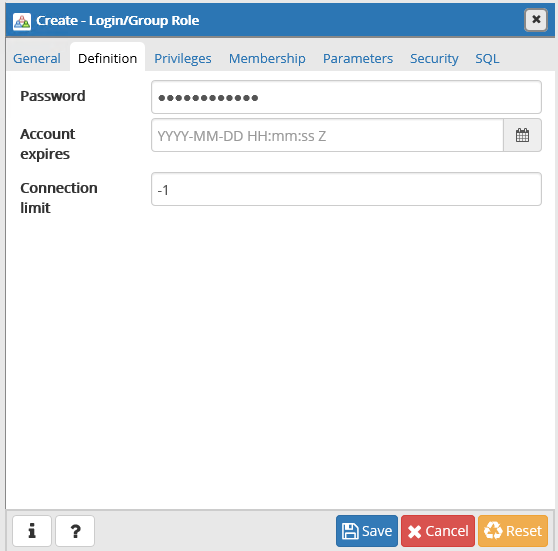
Click on the “Definition” tab and type a password:
Username: nexpose
P: YourPassword
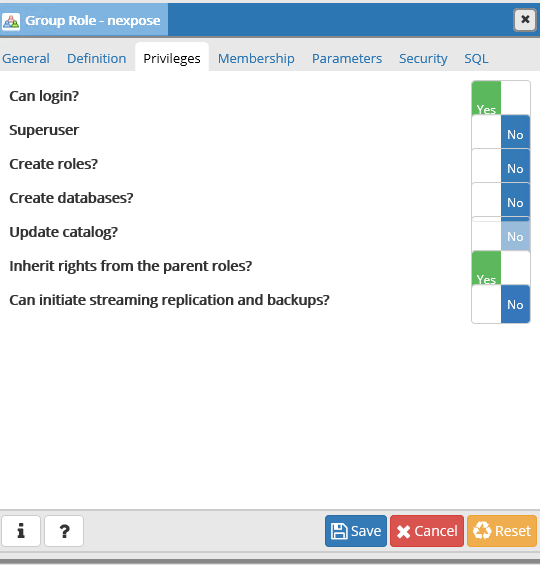
Under “privileges” go ahead and give it read rights
Save!
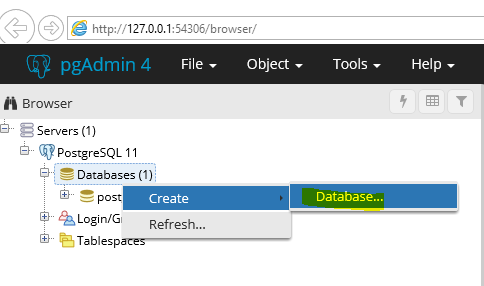
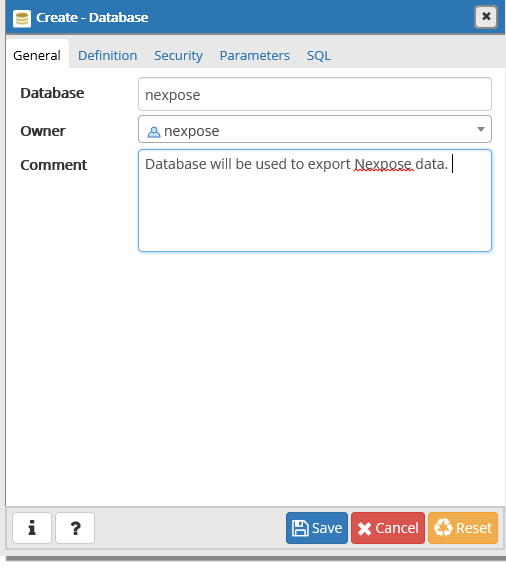
Now go back to the Databases and create a new database
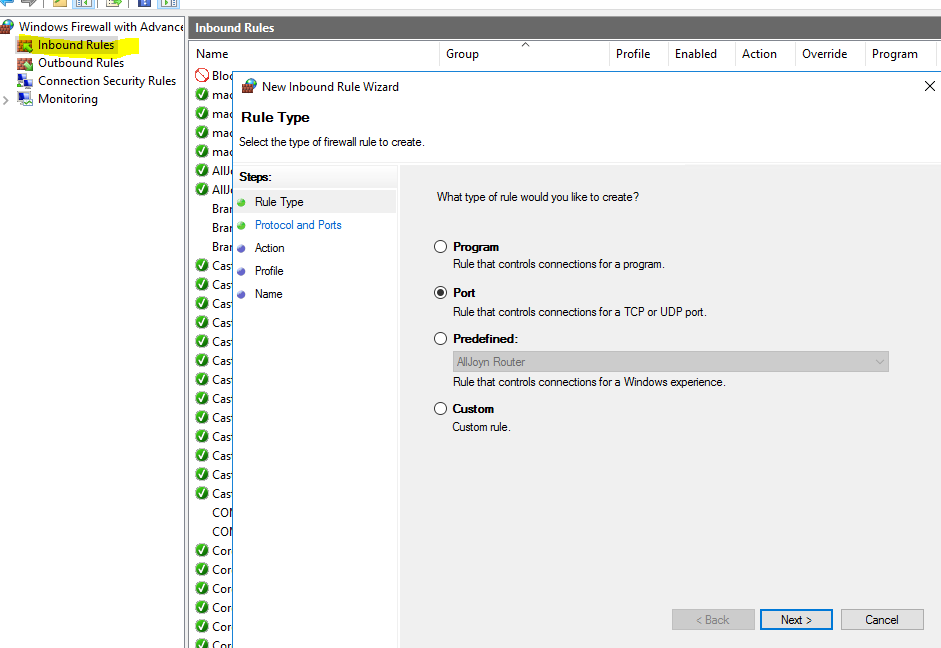
Step 2: Allow Inbound connections to Postgres Database on Windows Firewall
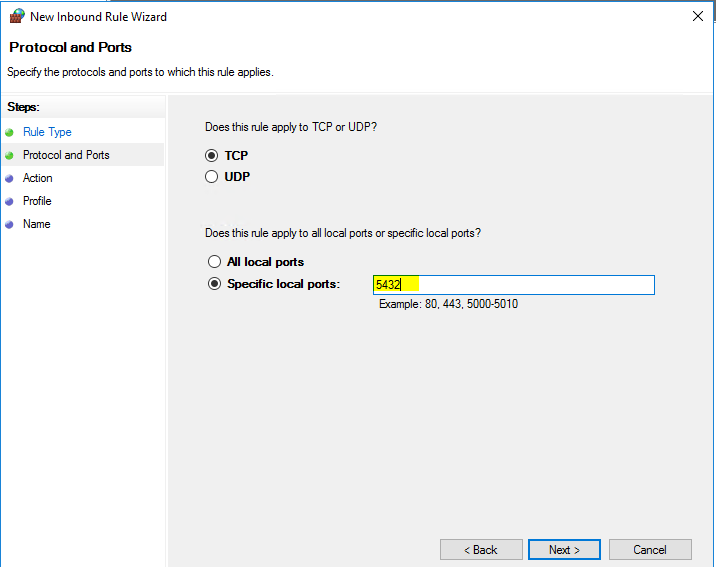
Next, we’re going to make an exception in the Windows firewall to ensure that our host is allowing incoming connections on port 5432.
2.1 Launch Windows Firewall with advanced Security
Right click on “Inbound Rules” and create New
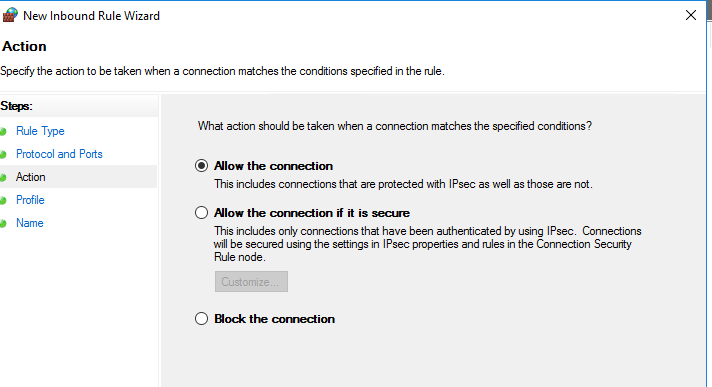
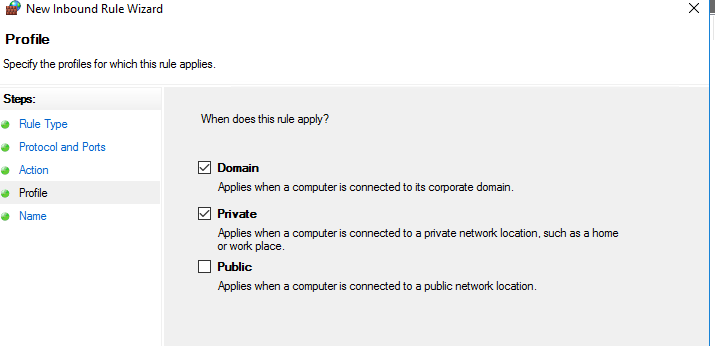
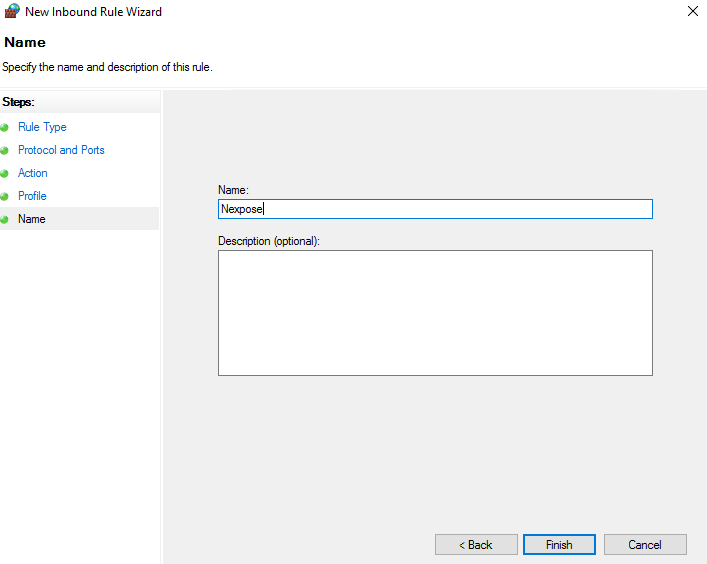
Done.
Step 3: Edit the Postgres Client Authentication Configuration (pg_hba.conf) file
The pg_hba.conf is the Client Authentication Configuration file which will allow us to trust connections coming from the Nexpose Console & the Splunk Host via Db-Connect. This step is crucial to ensure that we’re able to connect with our database.
Ensure that you allow connections from the Nexpose server so we may connect to the PostGres db.
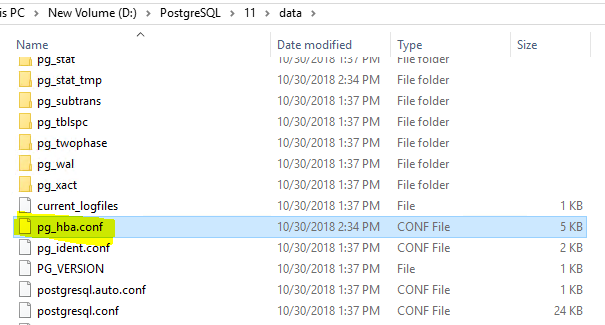
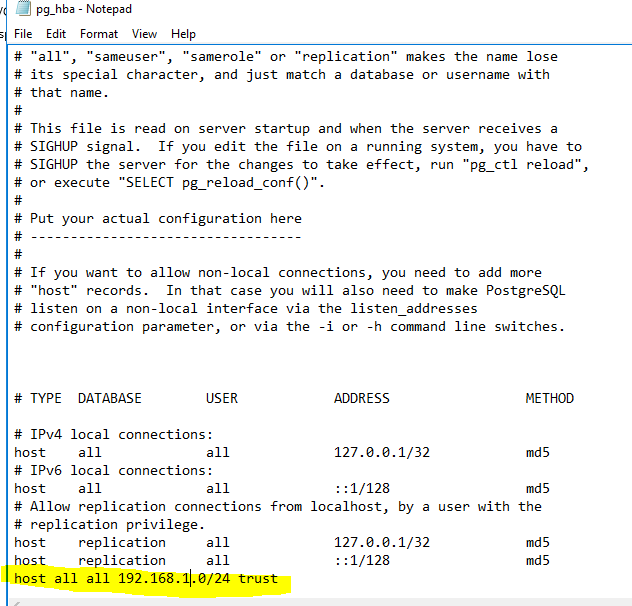
Ensure that both Nexpose & Splunk Heavy Forwarder are allowed, especially if they reside in different subnets.
Host all all 192.168.1.0/24 trust
Step 4: Setup Nexpose console to export data to the PostGres DB Host
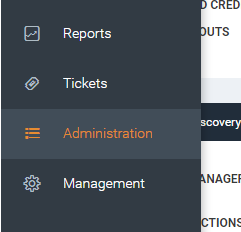
4.1 Navigate to Nexpose console via your favorite web browser.
Navigate to Administration
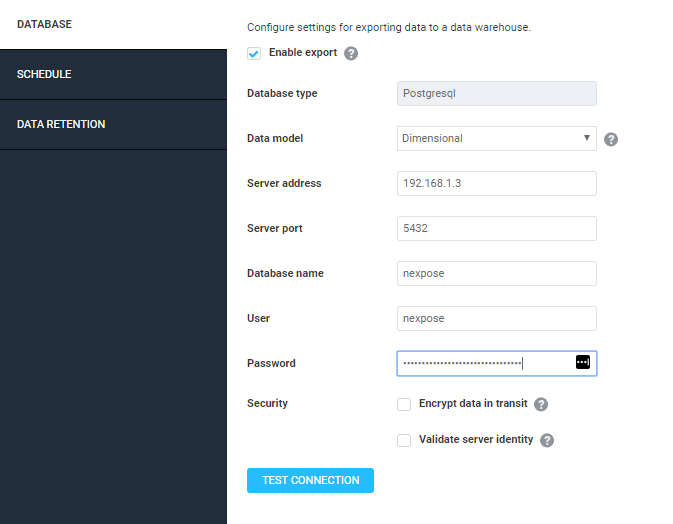
4.2 Look for “Maintenance, Storage and Troubleshooting” and click on “manage”

4.3 Enter the Server address and test the connection:
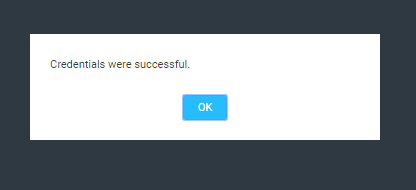
You should get a “Credentials were successful”
If you get other messages related to SSL, etc.. It probably means you didn’t enter the information correctly.
Next, setup a reoccurring schedule to ensure that new scan data is exported baed on your scanning schedule. In my example I set it to run every 12 hours.
Make sure you Save your settings at the top right
Now we wait.
Step 5: Build the SQL Queries
I wrote the following queries to match (or closely match) the fields returned and imported into splunk using the Rapid7-Splunk App. I’ve also included the Splunk Search index & sourcetype
1. Nexpose Software information
Scheduled export time: Cron: * 4 * * *
Splunk Search: index=nexpose sourcetype=”nexpose:software”
SQL Query:
SELECT dim_asset.asset_id, dim_asset.host_name as src_name,dim_asset.host_type
,dim_asset.os_name as "os", dim_asset.ip_address as "src", dim_asset.sites as "site_name", dim_asset_software.name as "software_name",
dim_asset_software.vendor as "software_vendor",
dim_asset_software.family as "software_family",dim_asset_software.version as "software_version
",dim_asset_software.type as "software_type" FROM
dim_asset
INNER JOIN dim_asset_software on dim_asset_software.asset_id = dim_asset.asset_id
2. Nexpose Vulnerability Information
Scheduled export time: Cron: 5 4 * * *
Splunk Search: index=nexpose sourcetype=”rapid7:nexpose:vuln”
SQL Query:
WITH
vulnerability_cve AS (
SELECT vulnerability_id, array_to_string(array_agg(reference), ',') AS cve
FROM dim_vulnerability_reference
WHERE source = 'CVE'
GROUP BY vulnerability_id
)
SELECT asset_id, da.ip_address as "dest_ip", da.mac_address as "mac", site_id, favf.vulnerability_instances, favf.vulnerability_id as "signature_id", dv.title as "signature", dv.severity as "nexpose_severity" , dvc.categories as "category",
dve.skill_levels, dvr.other_references, dv.cvss_score, dv.cvss_vector, dv.date_added, solution_summary, solution_count, solution_types,dv.date_published, favf.date,vcve.cve,dv.date_modified as "most_recently_discovered",dv.cvss_v3_score as "cvss"
from dim_site_asset
RIGHT OUTER JOIN (select favf.asset_id, favf.vulnerability_instances, favf.vulnerability_id,favf.date FROM fact_asset_vulnerability_finding favf) favf USING (asset_id)
LEFT OUTER JOIN (select dv.vulnerability_id, dv.title, dv.severity, dv.cvss_score,dv.cvss_v3_score, dv.cvss_vector, dv.date_added,dv.date_published,dv.date_modified FROM dim_vulnerability dv) dv USING (vulnerability_id)
LEFT OUTER JOIN (select dvc.vulnerability_id, (string_agg(DISTINCT dvc.category_name, ';') ) as categories FROM dim_vulnerability_category dvc GROUP BY dvc.vulnerability_id) dvc USING (vulnerability_id)
LEFT OUTER JOIN (select dve.vulnerability_id, (string_agg(DISTINCT dve.skill_level, ';') ) as skill_levels FROM dim_vulnerability_exploit dve GROUP BY dve.vulnerability_id) dve USING (vulnerability_id)
LEFT OUTER JOIN (select dvr.vulnerability_id, (string_agg(DISTINCT dvr.source || ':' || dvr.reference,';') || ';') as other_references FROM dim_vulnerability_reference dvr GROUP BY dvr.vulnerability_id) dvr USING (vulnerability_id)
LEFT OUTER JOIN (select da.asset_id, da.ip_address, da.mac_address FROM dim_asset da) da USING (asset_id)
LEFT OUTER JOIN (select vulnerability_id, (array_agg(summary))[1] as solution_summary, COUNT(solution_id) as solution_count, string_agg(distinct(solution_type),'|') as solution_types from dim_vulnerability_solution
JOIN (select solution_id, solution_type, summary from dim_solution) dsol USING (solution_id) GROUP BY vulnerability_id ) dsv USING (vulnerability_id)
JOIN vulnerability_cve vcve USING (vulnerability_id)
GROUP BY asset_id, da.ip_address, da.mac_address, site_id, favf.vulnerability_id, favf.vulnerability_instances,
dv.title, dv.vulnerability_id, dv.severity, dvc.categories, dve.skill_levels, dvr.other_references, dv.cvss_score,dv.cvss_v3_score, dv.cvss_vector, solution_count, dsv.solution_summary, dsv.solution_count, dsv.solution_types, dv.date_added,dv.date_published,favf.date,vcve.cve,dv.date_modified
3. Nexpose Asset Information:
Scheduled export time: 10 4 * * *
Splunk Search: index=nexpose sourcetype=”rapid7:nexpose:asset”
Note: This is a very large query and should be set to 4:10 a.m. to ensure that the previous queries do not interfere.
Set timeout to: 600 seconds.
Note: This is a very large query and might take some time depending on the amount of data in the database.
SQL Query:
SELECT dsa.asset_id, dag2.nexpose_tags,dsa.site_id, ds.site_name,da.sites,da.os_description as "os",da.os_architecture as "family", da.os_vendor as "vendor_product",da.mac_address as "mac", da.ip_address, da.host_name as "hostname", da.host_type, da.last_assessed_for_vulnerabilities,
dagc.asset_group_accounts, fa.vulnerabilities,fa.pci_status, fa.critical_vulnerabilities, fa.severe_vulnerabilities, fa.moderate_vulnerabilities, fa.malware_kits, fa.exploits, fa.vulnerability_instances,
fa.risk_score, dsoft.installed_software
from dim_site_asset dsa
LEFT OUTER JOIN (select da.asset_id, da.ip_address, da.mac_address,da.sites, da.host_name,da.os_description,da.os_architecture,da.os_vendor, da.host_type,da.last_assessed_for_vulnerabilities FROM dim_asset da) da USING (asset_id)
LEFT OUTER JOIN (select dagc.asset_id, (string_agg(DISTINCT dagc.name, ';')) as asset_group_accounts FROM dim_asset_group_account dagc GROUP BY dagc.asset_id) dagc USING (asset_id)
LEFT OUTER JOIN (select dat2.asset_id, (string_agg(DISTINCT dag2.name, ';') ) as nexpose_tags FROM dim_asset_group dag2 JOIN dim_asset_tag dat2 on dag2.asset_group_id = dat2.asset_group_id GROUP BY dat2.asset_id) dag2 using (asset_id)
LEFT OUTER JOIN (select fa.asset_id, fa.vulnerabilities,fa.critical_vulnerabilities, fa.severe_vulnerabilities, fa.moderate_vulnerabilities,fa.pci_status, fa.malware_kits, fa.exploits, fa.vulnerability_instances, fa.risk_score FROM fact_asset fa) fa USING (asset_id)
LEFT OUTER JOIN (select dasoft.asset_id, (string_agg(DISTINCT dsoft.name, ';')) as installed_software FROM dim_asset_software dasoft JOIN dim_asset_software dsoft on dasoft.asset_id = dsoft.asset_id GROUP BY dasoft.asset_id) dsoft using (asset_id)
LEFT OUTER JOIN (select dta.asset_id, (string_agg(DISTINCT dta.association, ';') ) as tag_association FROM dim_asset_tag dta JOIN dim_asset_tag dt ON dta.tag_id = dt.tag_id GROUP BY dta.asset_id) dta USING (asset_id)
LEFT OUTER JOIN (select ds.site_id, ds.name as site_name FROM dim_site ds) ds on (ds.site_id = dsa.site_id)
Step 6: Setup Splunk DB-Connect to pull data from PostGres Database.
- Create a Nexpose Identity
- On Splunk Navigate to Identifies and create a new identity caleld “nexpose” and enter the password you created for the PostGres “Nexpose” user
- Save it when done
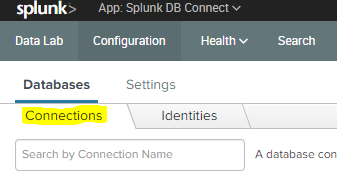
- Create a Database Connection
- Now on the Connections tab, click on “New Connection” and call it “nexpose”
- Select the appropriate Identity and connection type set to “Postgressql”
- Fill in the rest of the information that pertains to your environment
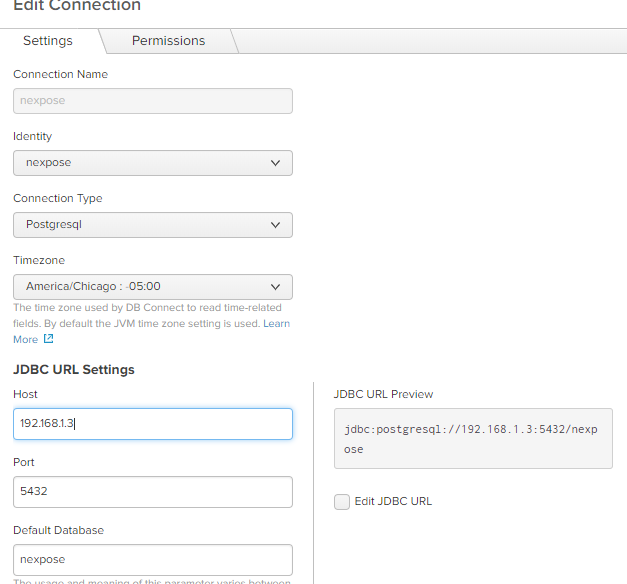
- Save once you are done.
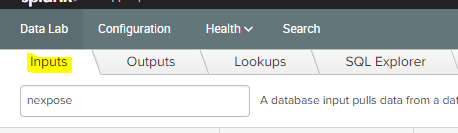
- Create a new input- Now that you’ve created an identity and connections in Splunk. Let’s create an input
- Select your Connection & Database Name. In this case “public” schema. Although If you leave it at default it should also work.
- Next paste your SQL query and “Execute SQL” to ensure that your query works.
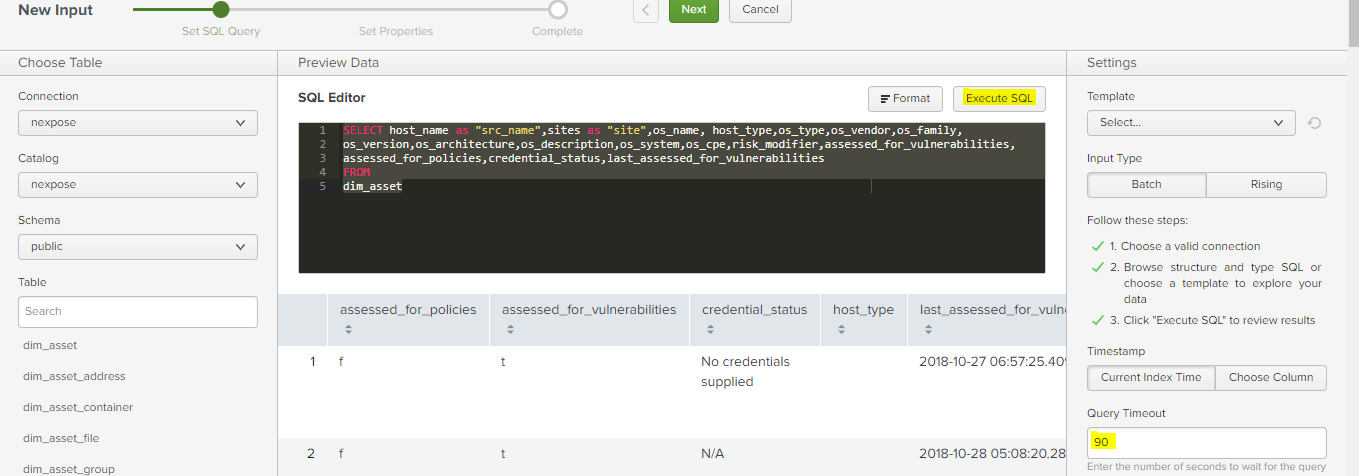
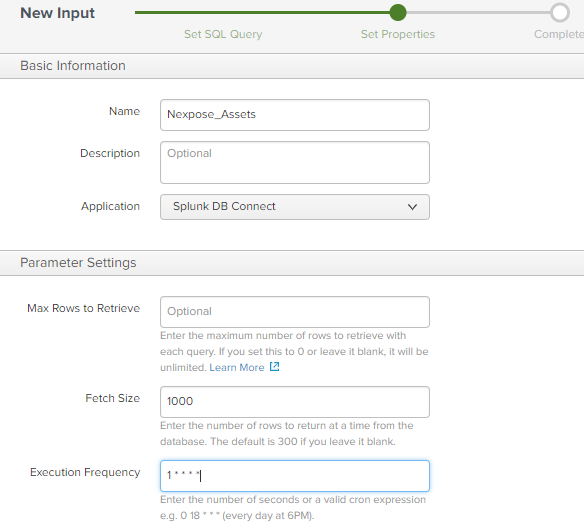
- Provide a meaningful name and set a cron job to schedule the queries
- On the index information you may leave the following blank:
– Host
– Source - Fill in the information for
Sourcetype: rapid7:nexpose:vuln
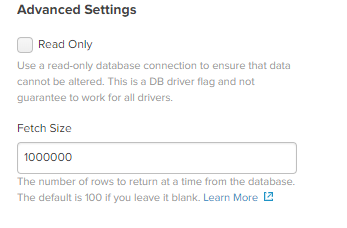
Index: nexpose - Set your Fetch size to whatever makes sense to you
- Done! Save and wait
Once the data imports to Splunk you may now start querying and creating meaningful reports.